You can add Resource citations as described below in several places:
•Sub-Elements: Page / Paragraph / Caution / Note / Warning
•Test Items, including for the Performance Job Sheet Test Item - Safety Precautions and Job Steps tabs, for adding resource citations/entries on the other tabs, please see here.
•Sheets, for adding resource citations/entries on the other tabs, please see here.
oDiagram Sheet - Diagram tab.
oInformation Sheet - Information tab.
oJob Sheet - Safety Precautions and Job Steps tabs.
oOutline Sheet - Outline tab.
oProblem Sheet - Directions tab.
Select  to open the Resource Selection screen. Find the resource needed, then click on it to select it. Then use Select to confirm your choice. Then scroll down to see the Add/Edit Resource tab to add information as needed.
Note: You cannot add Before or After Text to the Associated Resource of a test item, nor to any resources that are selected as an answer or distracter of a test item.
Select Save to keep the changes, select Cancel to close the Resource Selection screen without making a selection.

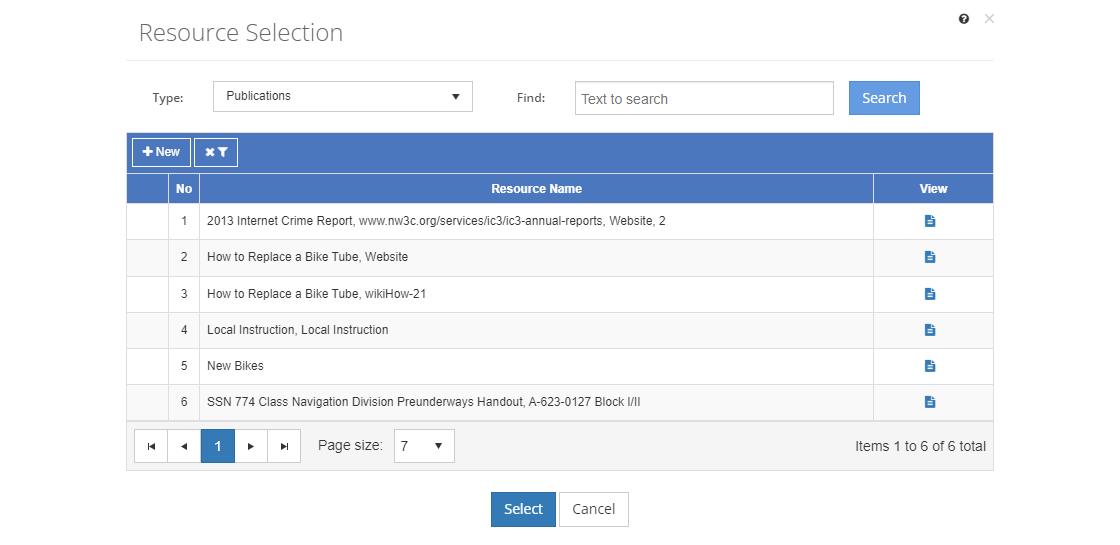
Figure 285: Resource Selection Screen
On the Resource Selection screen:
•Use the Type drop-down and the Find field to search for the resources to add.
•Select Turn Off Filter  to see all resources available in LEAD of the selected Type.
•Select Filter  to only see those resources that are listed in the Training Data > Resources area of the TNA or TMD.
•View the different versions of a resource by clicking on the arrow  in the first column.
•Select ![]() to create a new resource based on the current selected Type: Consumables, IETMs, IMM, Publications, Software, or Tools/Equipment.
to create a new resource based on the current selected Type: Consumables, IETMs, IMM, Publications, Software, or Tools/Equipment.
oComplete the fields of the new resource.
oSelect Save to keep the new resource. The newly created resource is shown as selected at the top of the list.
oSelect Cancel to return to the selection screen.
•Select View  to view the resource information.
Note: If you select an IETM, you can then select the table of content item(s), or nodes, to cite on the IETM Selection screen.
Type
The Type drop-down allows you to choose which type of resource to list for you to choose from.
Finding the Resource to Select
If you can't find the resource you're looking for, enter a search term in the Find: field and select Search. The table will list all resources of the selected type that contain your search term on the screen. Select  to clear the search term and view all items again.
Alternatively, you can use the Filter drop-down to limit the list of resources to a specific sub-category, as set up on Customizations screens.
You can click on the column header to sort the entries. Clicking on the column header again will reverse the sort. Small arrows in the column header let you know which way the data is currently sorted.
Resource Name
The Resource Name shows both the name and the number of the resource to help you select the resources you need for the learning event.