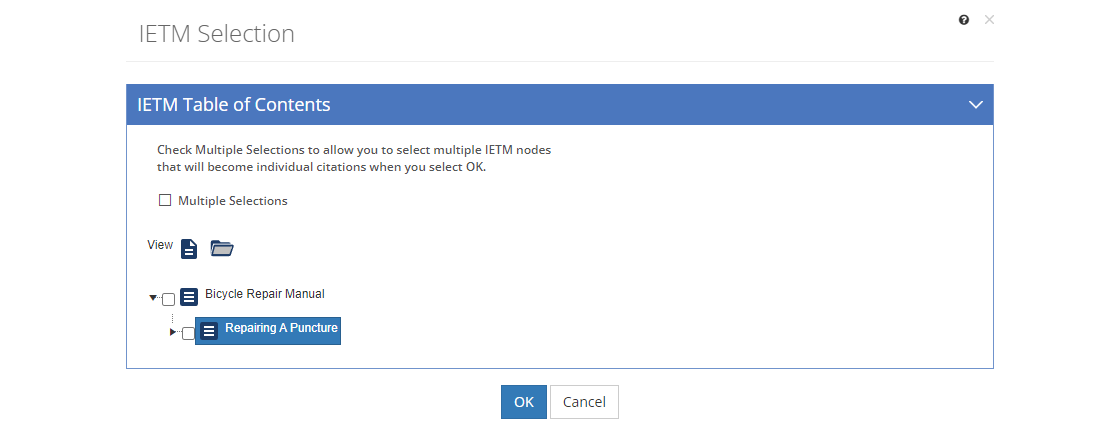
Once you have selected the IETM on the Resource Selection screen, the IETM Selection screen opens.

Figure 286: IETM Selection Screen
On this screen you can select a node (or table of contents item) and then select:
• to open the IETM to the selected node, provided you have the correct URL listed in the IETM and any necessary software installed.
•Expand  to open up to five (5) levels of sub-folders of the IETM table of contents at a time.
Note: You can also view the IETM table of contents on the Resources > IETMs screen, by selecting the IETM in the list and then selecting View  in the toolbar.
On the IETM Selection screen, you have three choices to create IETM citations:
•Single Citation - If you want to cite just a single node, check the checkbox next to the node that you wish to cite in the resource entry. Then select OK to save your selection. This creates a citation for that single node.
•Citation of a Range - If you want to cite a range of nodes (for example, paragraphs 2.c.1 through 3.a.), check the checkbox next to the first node and the last node. Then select OK to save your selection. This creates a single citation that includes the first node through to the last node.
•Multiple Citations - Select the Multiple Selections checkbox near the top of the screen, then check the checkboxes of as many nodes as you need to create citations for. Select OK to save your selection. LEAD will create one IETM citation per selected node. You can then edit each citation to add any required Before and After Text.
Note: This checkbox is not available when only a single citation can be created (for example as an answer or distracter for a test item).
Once you've made your selection(s), select OK to save it, or select Cancel to return to the Resource Selection screen.