When you edit Resource citation on the tabs listed below:
•Assignment Sheet - Study Questions tab.
•Diagram Sheet - Diagram tab.
•Information Sheet - Information tab.
•Job Sheet - Safety Precautions, Job Steps, and Self-Test Questions tabs.
•Outline Sheet - Outline tab.
•Problem Sheet - Directions and Problem tab.
•Performance Job Sheet Test Item - Safety Precautions and Job Steps tabs.
For information on how to work with Resource citations on the other tabs, please see here.
You have additional options when you select an IMM graphic with an associated JPG, JPEG, or PNG file, as you can also:
•View the graphic.
•Set the following for each graphic:
To Add a Resource Citation/Entry
Select  to open the Resource Selection screen and select a resource. Once you have selected a resource, scroll down to see the Add/Edit Resource tab. Select Save to keep the changes, select Cancel or Close to return the list of entries.
To Edit a Resource Citation/Entry
Select Edit  for an existing resource citation/entry. Scroll down to see the Add/Edit Resource tab. Select Save to keep the changes, select Cancel or Close to return the list of entries.
Working with Resource Citations/Entries

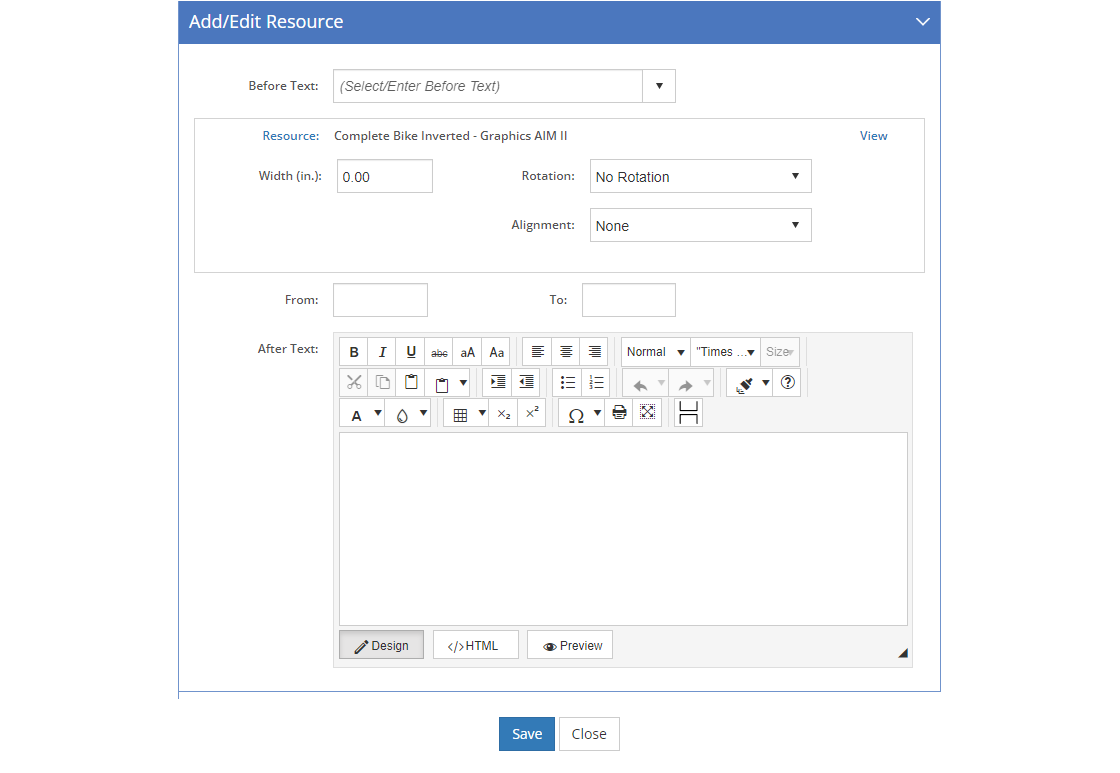
Figure 249: Add/Edit Resource Screen
Before Text
The Before Text is listed before the resource information when the information is displayed or printed. You can enter your own text, or select the Before Text from the list. The list shown can be customized on the Customizations tab.
Resource (link)
The selected Resource shows next to the Resource link. Select the Resource link to show the Resource Selection screen and change the selected resource. If the resource name itself is linked, you can select it to either change the selection(s) of the IETM table of content using the IETM Selection screen, or view the IMM file associated to the resource. IMM graphic files will display in a new tab, and you may need to close the tab to continue working in LEAD. If the associated file is a Microsoft® PowerPoint®, then selecting the hyperlink will display the slides in the Slide Viewer.
The following four fields only apply to IMM Graphics that are supposed to be printed, for example on the Sheet or on a Performance Job Sheet.
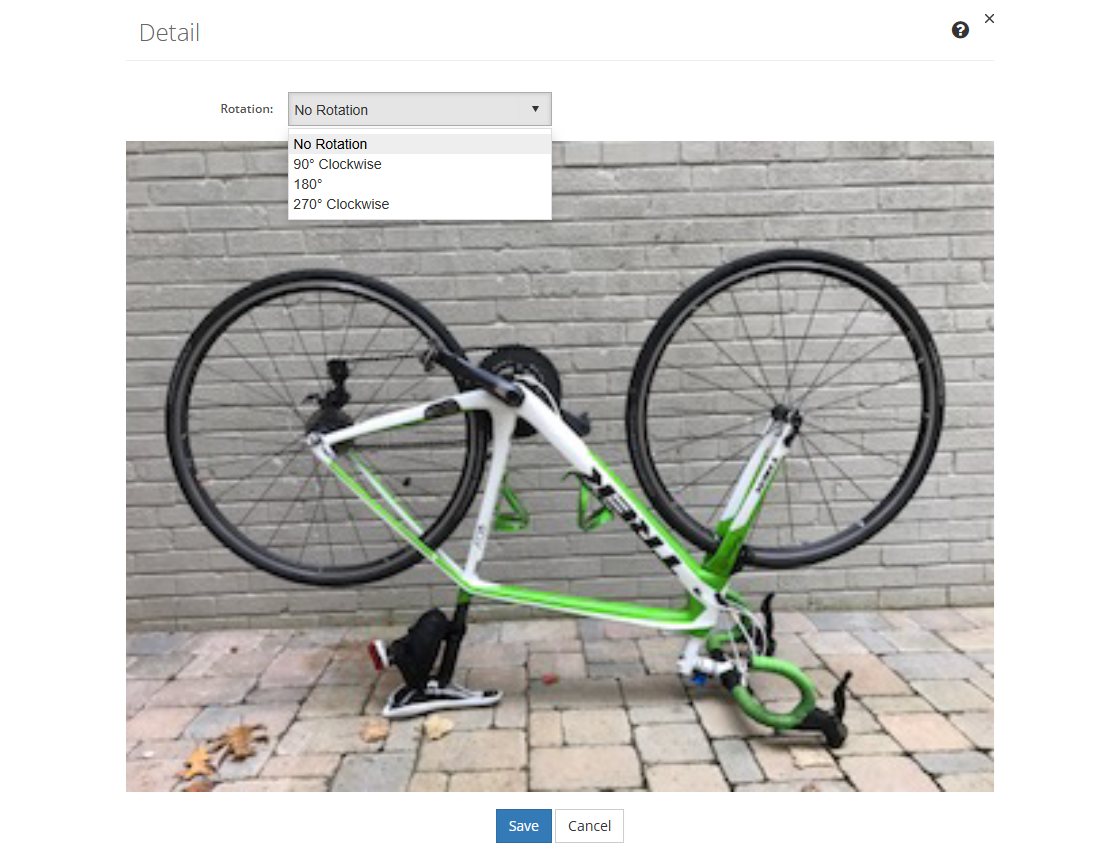
Select View to preview the graphic in the Detail pop-up screen.

Figure 250: Sheet - View Detail Screen (Image Viewer)
On this screen, you can set the rotation using the Rotation drop-down and preview the resulting orientation. This allows you to make sure that you have selected the correct rotation for your needs. Select Save to keep the rotation value you selected, select Cancel to clear the selection you made. Remember you still need to save the selected resource to save your edits.
Note: The View link only appears after you have selected an IMM graphic with an associated JPG, JPEG, or PNG file.
Width (in.) (for IMM Graphics only)
The Width (in inches) of an IMM graphic with an associated JPG, JPEG, or PNG file. If you leave the field at 0, the graphic will print in its original size, or be scaled to the page width if it is larger than can fit on a page. If the graphic is scaled, the original aspect ratio will not change (so your graphics won't be stretched to fit the page).
The maximum width available is about 7" for an 8.5"x11" piece of paper with 0.75” margins on each side. The maximum height is 80% of the print height, where the print height is from margin to margin, or roughly 9", though that will depend on the header and footer, if you have a long initiative title or have a classification selected, you may have less space to work with.
Note: If you select a rotation, it will be applied before the width is applied. So, if the graphic is 3” wide x 2” tall, and you set a width of 4” and a rotation of 90º, then the resulting graphic would rotate – so it’s now 2” x 3” – and then the width is set to 4", so the graphic would be 4” x 6”.
Rotation (for IMM Graphics only)
The selected Rotation for an IMM graphic with an associated JPG, JPEG, or PNG file. You can choose your desired rotation of the graphic on the printed page from the drop-down, including No Rotation (prints the graphic as it is), 90º Clockwise, 180º, and 270º Clockwise.
Alignment (for IMM Graphics only)
The selected Alignment for an IMM graphic with an associated JPG, JPEG, or PNG file. You can choose your desired alignment on the printed page from the drop-down, including None (uses the default alignment on printing), Left-Justified, Centered, and Right-Justified.
From
The From field is the starting point for this resource, like a slide number, page, or chapter. This information directs the reader to where they need to go to in the resource. You can use the After Text field to provide more information than the 20 characters available for this field.
To
The To field is the ending point for this resource, like a slide number, page, or chapter. This information lets the reader know how far they need to go in the resource. You can use the After Text field to provide more information than the 20 characters available for this field.
After Text
The After Text field provides additional information to the reader in how to use the selected resource. For more information on how to use the text editor, click here.