On the Assignments screen:
•Select ![]() to create a new self-assigned assignment.
to create a new self-assigned assignment.
•Select View  to review a selected assignment. If you need to make any changes, select Edit on the Assignment Detail screen.
•Select Edit  to make changes to a selected assignment.

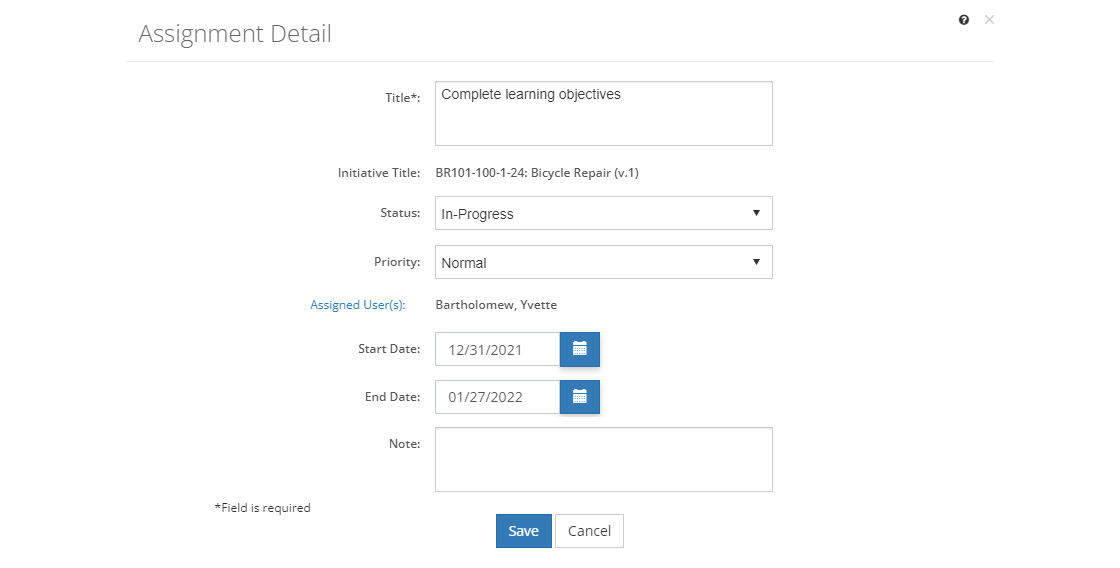
Figure 29: Assignment Detail Screen
Any of these options opens the Assignment Detail screen, ready for you to enter, review, or update the fields below. Then select Save to save the changes to an existing assignment or to create a new self-assigned assignment and return to the list of assignments. Select the X at the top right of the pop-up to close the Assignment Detail screen or select Cancel to close the pop-up without saving any changes.
Title
The Title field shows the name or title of the assignment. You can create initiative-based assignments on the Initiatives > Analysis/Design > Initiative Management > Assignments screens. LEAD automatically assigns assignments to the owner of the initiative, though you can reassign them to other users, as needed. You can create self-assigned assignments on the Dashboard > Assignments screen. Assigned assignments are listed on the Dashboard and Assignments screens.
Initiative Title
The full name or Initiative Title of the initiative, if applicable.
Status
The current Status of the assignment. The following options are available: Not Started, In Progress, Completed, Waiting, and Deferred.
Priority
The Priority field shows the current priority of the assignment. The following options are available: Low, Normal, and High.
Assigned Users
The Assigned Users link allows you to select the users assigned to complete or track completion of the assignment.
Start Date
The Start Date shows the expected start date of the assignment.
End Date
The End Date is the expected end date of the assignment.
Note
The Note field shows more information about the assignment.