•Select ![]() to create a new announcement.
to create a new announcement.
•Select View  to review a selected announcement. If you need to make any changes, select Edit on the Announcement Detail screen.
•Select Edit  to make changes to a selected announcement.
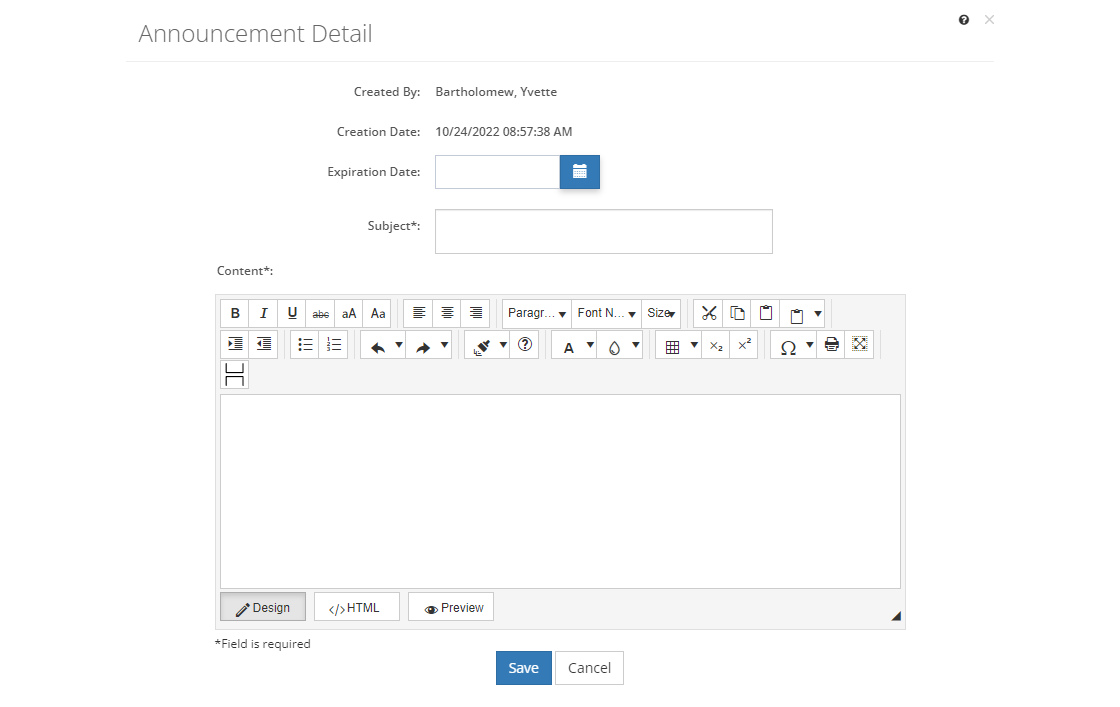
Any of these options opens the Announcement Detail screen, ready for you to enter, review, or update the fields below.

Figure 363: Announcement Detail Screen
•To create a new announcement, select Save once you've entered all the information. Likewise, to keep the edits you've made to an existing announcement, select Save. This will return you to the list of announcements.
•If you do not want to keep the edits or create a new announcement, just select Cancel to close the pop-up.
•If you're reviewing a announcement, you can select Edit to make changes or you can close the pop-up window by selecting the X in the top right of the pop-up.
Announcement Fields
Created By - View Only
The Created By field shows the user name that created the announcement. When you create a new announcement, your user name is automatically selected.
Creation Date -View Only
The Creation Date is the date and time the announcement was created, this is automatically set from the server time when you selected New, not when you Save the announcement.
Expiration Date
The Expiration Date is the date the announcement will no longer display on the login screen.
Subject
The Subject is the title of the announcement.
Content
The Content field captures the actual announcement text that can be formatted as needed.